How to make an advent wreath
Ring in Christmas, the crafty way.
Making your own Christmas decorations is a great way to get into the festive spirit. Advent wreaths are traditionally made with pine, holly and other greenery, while our DIY instructions are for an elegant, modern version made from sticks. This DIY wreath made from wood also has the advantage of lasting for a long time so you can reuse it year after year.
The lighting of an advent wreath is a beautiful tradition which dates from the nineteenth century. On each of the four Sundays in Advent, a new candle is lit, which means that by Christmas all four candles are burning. It functions as a kind of calendar that counts down to Christmas.
To make this decoration you will need branches of differing diameters. You can use cuttings from your garden or collect wood for your DIY advent wreath while out and about. You can often find beautiful weathered wood washed up by the edges of rivers and lakes, or pick up branches and sticks from the bush.
Before you can start on your advent wreath DIY, let your branches dry out for a day or two, leaving them spread out somewhere warm and dry. When ready, just brush away any dirt and dust and your wood is ready to work with!
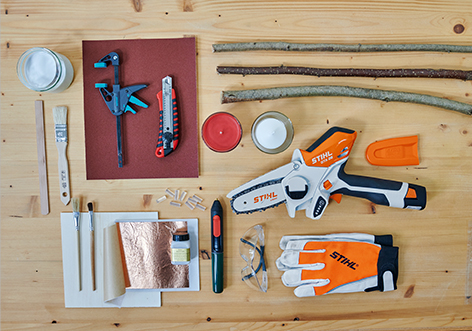
STEP 1: Gather your materials and equipment
Consider what colour and size you would like your advent wreath to be. When you have decided, prepare the following:
- Branches of different diameters
- GTA 26 Garden Pruner
- Paint (optional)
- Brush (optional)
- Gold leaf or metal leaf (optional)
- 4 glass candle holders
- 4 candles
- Wooden board to use as a base
- Hot glue gun
- Personal protective equipment
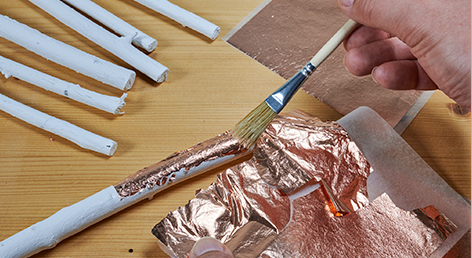
STEP 2: Paint your wreath
Whether you decide to paint it or leave the wood bare, your wooden advent wreath will look chic and beautiful. If you prefer a painted finish, paint the wood in your preferred colour before you start construction, and carefully prop it up to dry. For an extra special festive look, you could even add some sparkle with metal leaf on parts of the twigs.

STEP 3: Prepare the base
A wooden board will form the base of your advent wreath; ideally, it should be slightly smaller than the finished wreath itself, for better stability. Don’t let the candle flames come into contact with the wood – it’s best to use glass candle holders or poured candles instead. Then, position the glass candles on your wooden board, evenly spaced.
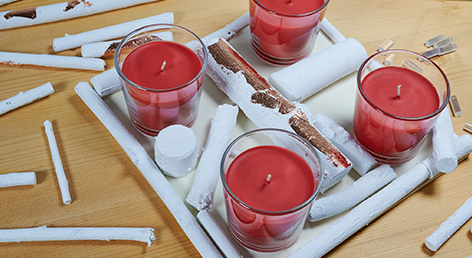
STEP 4: Attach the twigs
Now it’s time to put the twigs on. Using a hot glue gun, stick a layer of twigs to the wooden board. Glue on the remaining twigs a layer at a time, arranging them in and around each other in a pattern (get creative!). However, keep some space around each glass candle holder so you can remove them easily once they’re used up.
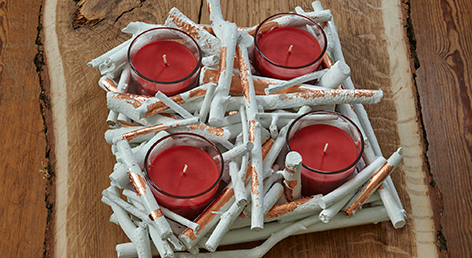
STEP 5: Decorating your DIY advent wreath
Your Christmas wreath is finished and ready to bathe your home in warm candlelight. You can customise it further too, if you wish – add dried orange slices, berries, pine cones, pine branches and eucalyptus to bring a splash of quirk to your advent wreath.
Share your amazing advent wreaths with us on social media by tagging @STIHLAustralia on Facebook or @stihl_au on Instagram.