How to make wooden star ornaments
Create the night sky at home.
Christmas just isn’t the same without decorations, especially stars. There’s something magical about the night sky and there’s nothing better than making your own, personalised decorations for around the home.
The following instructions give you the details to make a chunky star ornament. This isn’t a DIY adventure for the little ones either – so make sure you keep small hands out of your workspace. We have, however, designed it so it’s easy for you to make a few stars at once, especially considering you’ll be working with a large chunk of wood.
Before your start, prepare your tools, equipment and materials.
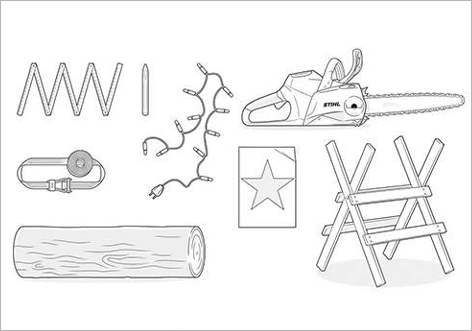
Materials:
- A wooden log, approximately 30 to 40 cm in diameter.
Tools and equipment:
- Sawhorse
- Tensioning belt
- STIHL chainsaw
- Chalk for marking
- Metre rule or wooden slat as a straight edge
- Paper or cardboard star template.
Click to download star template
With all your tools and materials together, you can start work on your wooden decoration. As you get ready to start, check if your working area is safe: you should have plenty of space to work in, and there should be no trip hazards or other risks, including other people and animals.
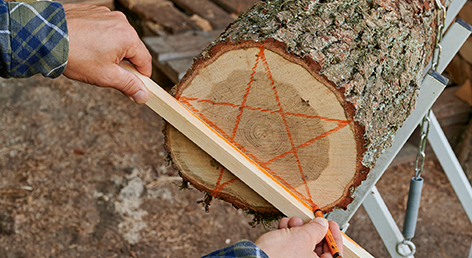
STEP 1: Fix and mark your log
Fix the wooden log onto a sawhorse with a tensioning belt, then position your star template at the centre of the end face of the log. Use chalk to draw around the star template, which will be the guide you’ll use to cut out the shapes later.
If you want to make a star that uses the whole diameter of your log, but your template is too small, use the existing template to mark the five points on the outer edge of the log. Then, use a ruler to draw the new star shape onto your log.
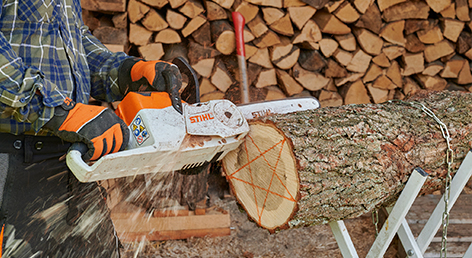
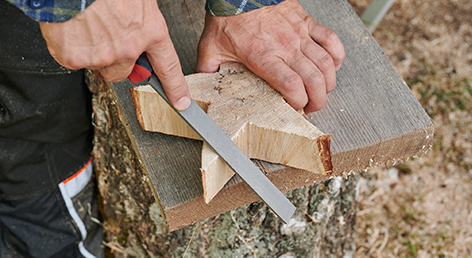
STEP 2: Create the star shape
Here’s where it gets exciting! You’ll be using the outline of the star you just drew on the log and your chainsaw to cut into the wood and create the star shape. Starting with your chainsaw against the bark, saw diagonally down into the wood along two lines to create the top point of your star, but stop cutting when you reach the next marked line. Try to keep the bar as level as possible so that you don’t make too deep a cut with the bar nose and saw into the next point.
Then, turn the log so the next point on your star is pointing upwards and make two cuts like you did before. Repeat this until you’ve sawn out all the pre-drawn lines and you can see the wooden star shape is ready.
To remove the excess wood, make some extra cuts further down the log and straight into it. Be careful, however, as you don’t want to cut the star off the main log yet.

STEP 3: Liberate your star!
Once you’ve made the basic shape, you can simply take a slice from your star log, of whatever thickness you want your wooden star to be. At this stage it’s easy to make several stars at once.
STEP 4: Taking care of your star
To keep your star protected and looking beautiful for future Christmas, we recommend you take a little extra time to polish it up.
Here are a few care tips:
- If the wood is dry and you’ll only be using the ornament indoors, you can leave the surface unfinished.
- If the wood is semi-dry, it’s best to treat it with an interior varnish that’s suitable for use on toys (e.g. beeswax varnish).
- If you want to use your star outdoors, make it weather-resistant with a suitable wax or wood sealer.
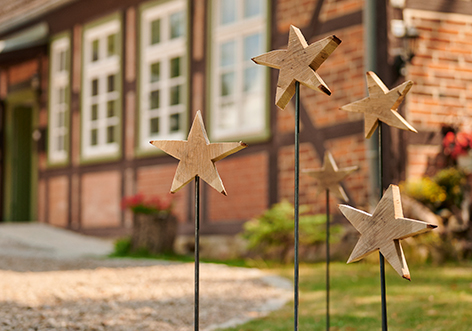
BONUS STEP: Put your wooden stars on sticks instead – here’s how!
Another option is to attach a metal stick to your finished wooden star. This makes your handiwork into an ideal ornament for sticking into flower pots, beds or the lawn.
Tools and materials for mounting your wooden star on a stick:
- Metal stick (e.g. made from iron, diameter approx. 9.6-9.8mm)
- Wood drill bit (10mm)
- Cordless screwdriver
- Hacksaw
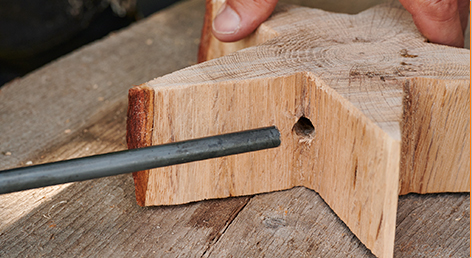
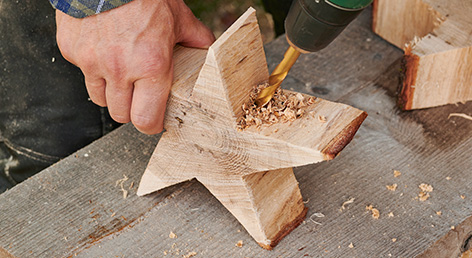
How to attach the star to a metal stick
Using a wood drill bit, drill a hole in the bottom of the star. The hole should match the diameter of the metal stick. Next, cut the metal stick to your preferred length using a hacksaw. Then all that’s left to do is push the wooden star onto the stick and you’ve got yourself a star on a stick!
We can’t wait to see what you make, so don’t forget to share your star with us on social media by tagging @stihl_au on Instagram or @STIHLAustralia on Facebook.