#How To
How To Make A Bug Hotel
For those that have never heard of a bug hotel, we’ll start off by explaining what it is, and you’ll soon understand why you need one of these in your garden. Attracting bugs into your garden might not sound like something that you want to do, but it may surprise you to learn that insects are an integral part of any successful garden.
Some insects help control and reduce the population of detrimental insects, otherwise known as pests, and are also responsible for the pollination of ornamental flowers and food crops. Providing a safe haven for these insects to hibernate and breed within your garden year round will encourage healthy pollination and keep nasty parasites away.
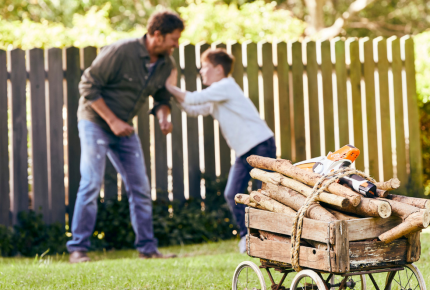
Insects are very picky when it comes to accommodation however, so follow our quick guide to make sure you get it just right. Not only is this project a perfect excuse to use your chainsaw, it’s also a great way to teach the kids about the garden.
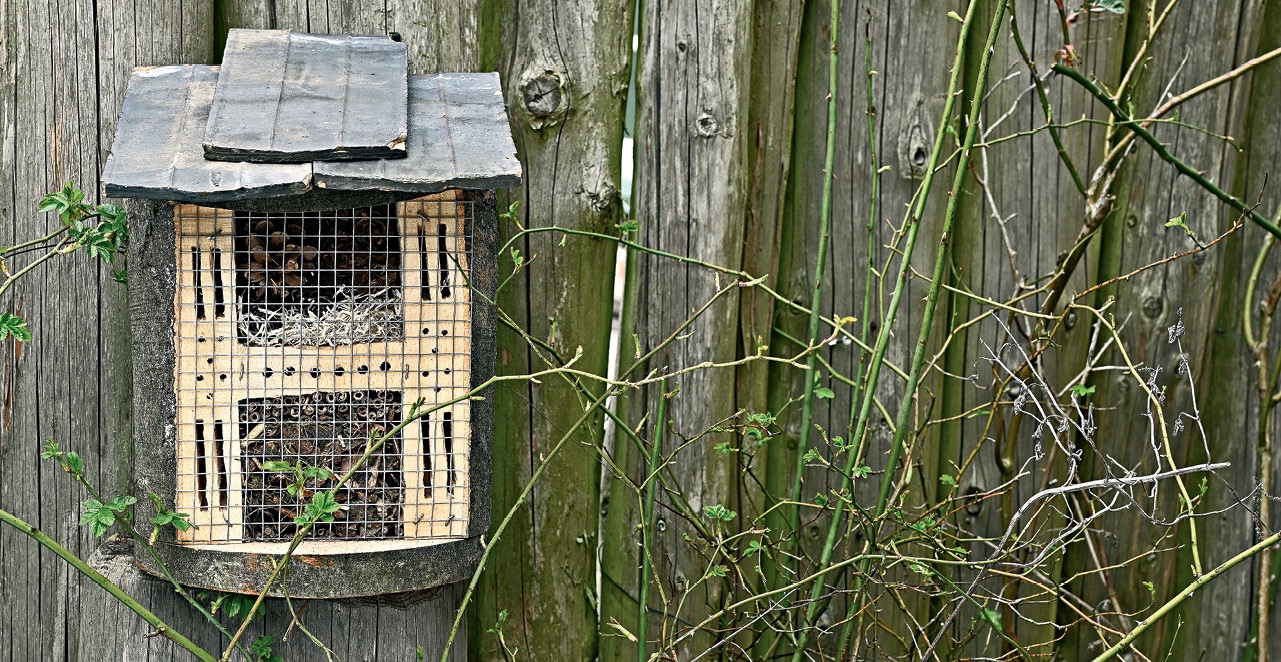
Your bug hotel should be positioned at least a meter off the ground. This will keep it protected from small and curious children and animals. For the best results, make sure it’s positioned somewhere where the front will see the most sun throughout the day to ensure it stays as warm as possible and dry’s easily after rain. Avoid hanging it under a tree or in a shady area.
The most ideal place is hanging front a fence, near plenty of nectar and pollen-rich plants so your new habitants don’t have any issues finding food.
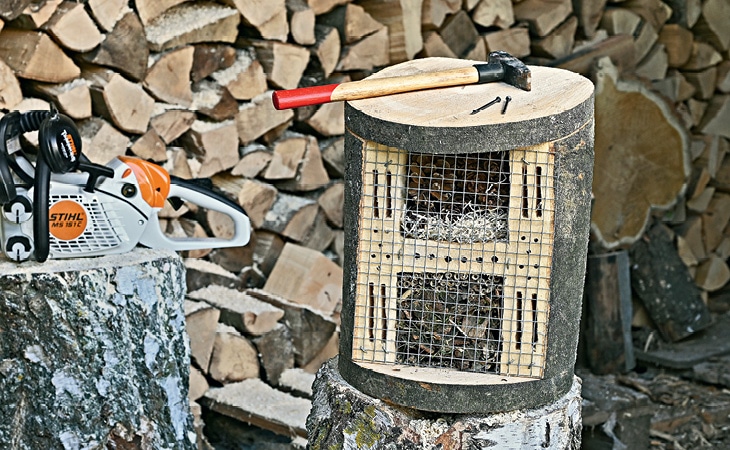
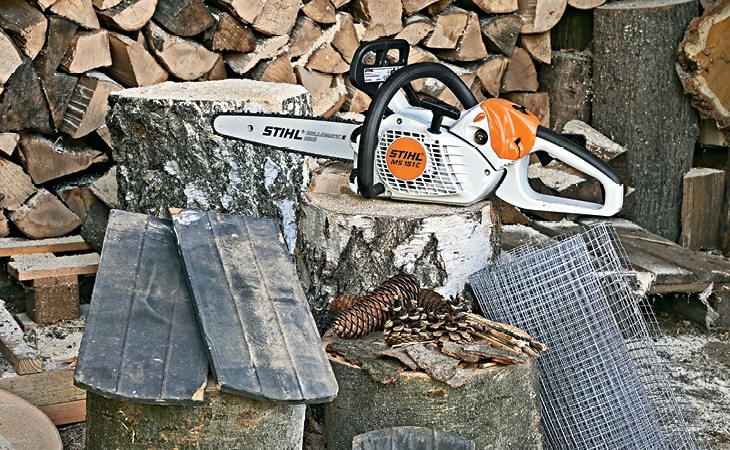
What you’ll need:
- A chainsaw, nothing too big!
- A drill
- A sawhorse or workbench
- Wire mesh
- Pine cones
- Reeds
- Bark or mulch
- Old roof tiles (optional)
- Hammer
- Nails
- Staple gun
STEP 1:
Start by cutting the log to shape for the pitched roof of your bug hotel, but first you need to make sure the log cannot roll away while you cut it. A classic sawhorse or a notched tree stump will make this a lot easier.
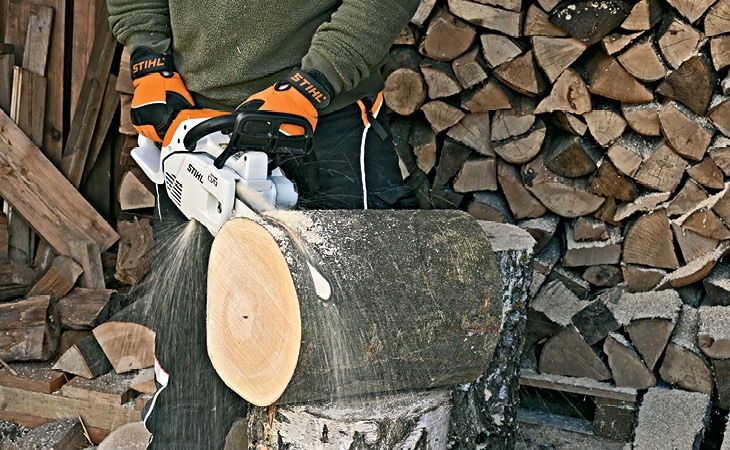
STEP 2:
Follow by cutting off a 4-centimetre-thick cookie on a slight angle. This piece will be used to create the roof. For the base, cut a cookie of similar thickness from the bottom of the log. Set these two pieces aside for later.
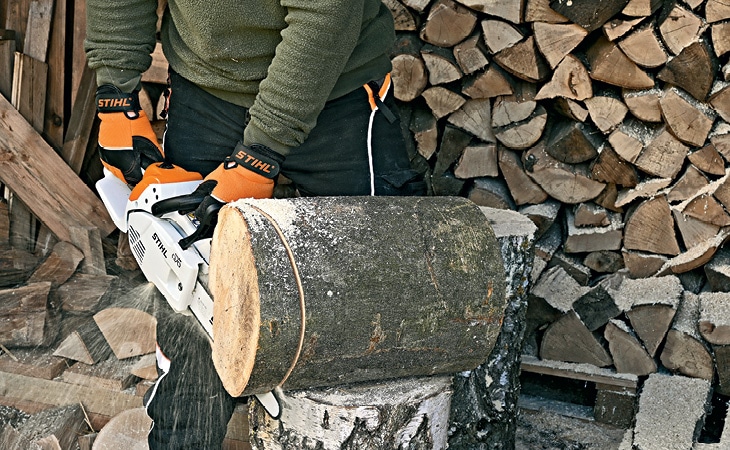
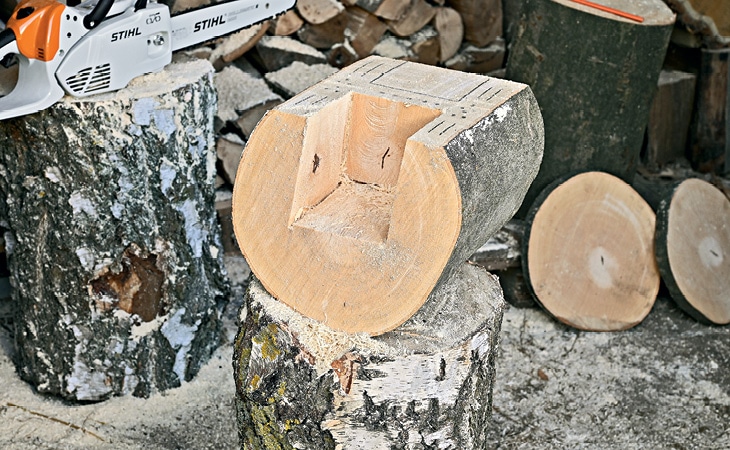
STEP 3:
To create the front of the bug hotel, set the log upright and secure it in place on a sawhorse or somewhere sturdy. Start by cutting off a slice so your log has a flat face. On this face, sketch out the areas for recesses, holes, and slits. The slits provide shelter for butterflies, while the holes are perfect for wild bees. The recesses can be filled with materials that beneficial insects love, such as pine cones, bark, reeds, and wood shavings.
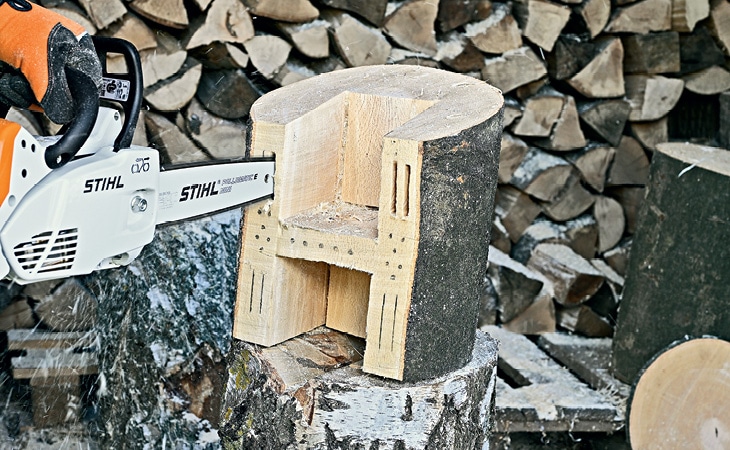
STEP 4:
Use a chainsaw to cut out the marked recesses. Start by making an initial vertical cut, then make the horizontal plunge cut.
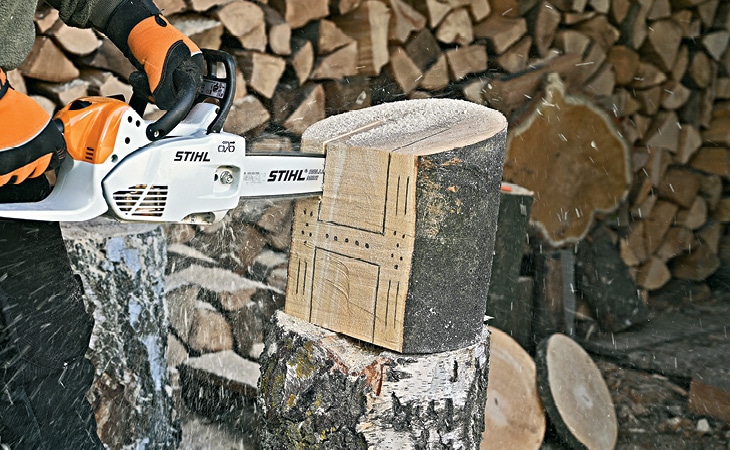
Be sure to make the plunge cuts slowly and carefully as this particular type of cut carries the risk of a kickback. Make sure you always follow the safety component of the chainsaw’s operating instructions, and only use the method if you’re familiar with it. After the plunge cut, make the second vertical cut.

To complete the recess in your bug hotel, lie the log down to make the fourth cut. After sawing the first recess, repeat the steps for second recess.
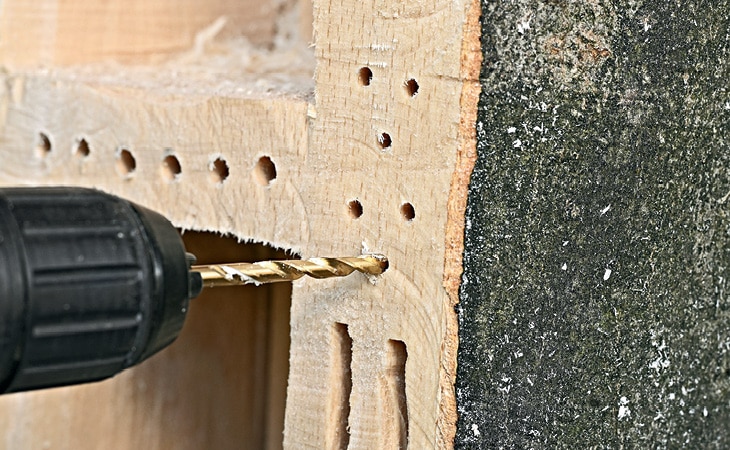
STEP 5:
Saw the slits into the log where you have marked them.
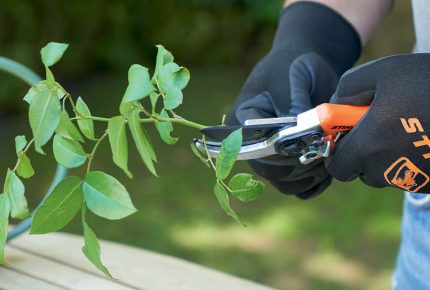
Then, use a drill to make the holes for your bug hotel. The holes you make should be between 3 and 6 mm in diameter – insects prefer smaller holes. Make sure there are no splintered edges; smooth them with sandpaper to finish.
STEP 6:
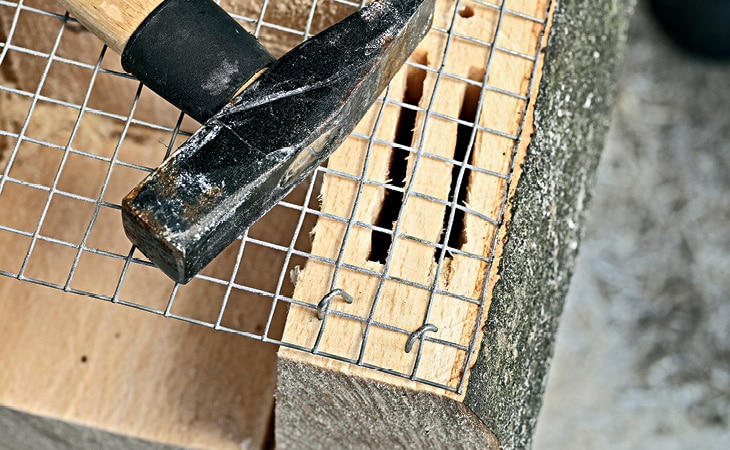
The insects in your bug hotel need to be protected from nosy birds.
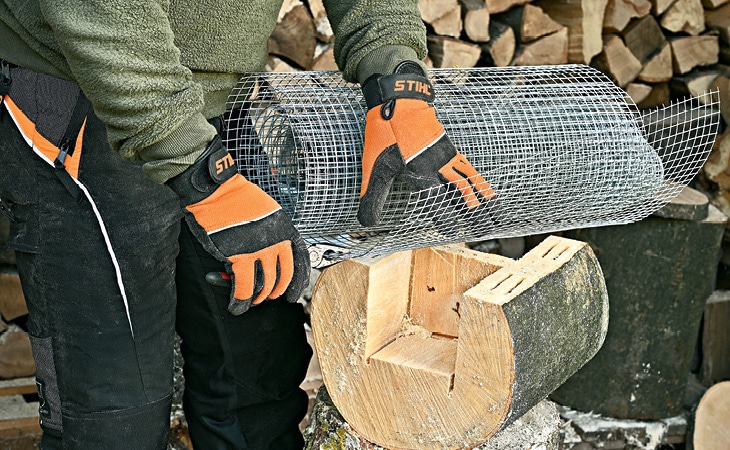
Use pliers to cut a square piece of wire mesh big enough to cover the whole front of the bug hotel, then fix it in place with fencing staples.
STEP 7:
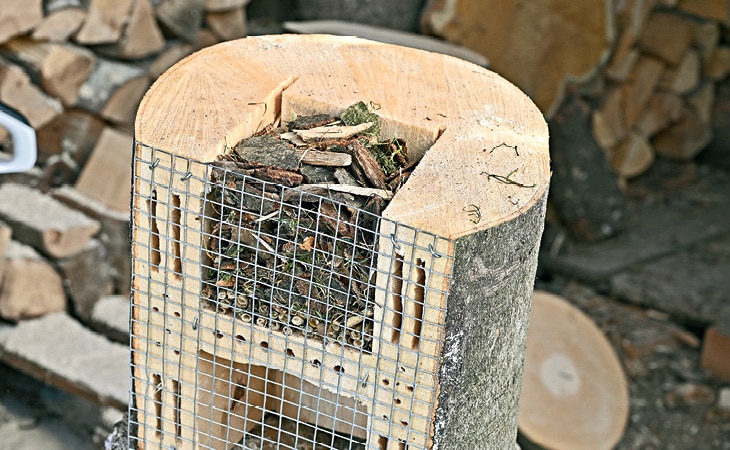
This step is one of the most important. It’s time to fill your hotel with nesting materials for your insects. Turn it upside down and start by filling the bottom section. Cut grasses and reeds to the right length and stack them in the recess. Follow by topping with mulch to keep your hotel nice and insulated.
STEP 8:
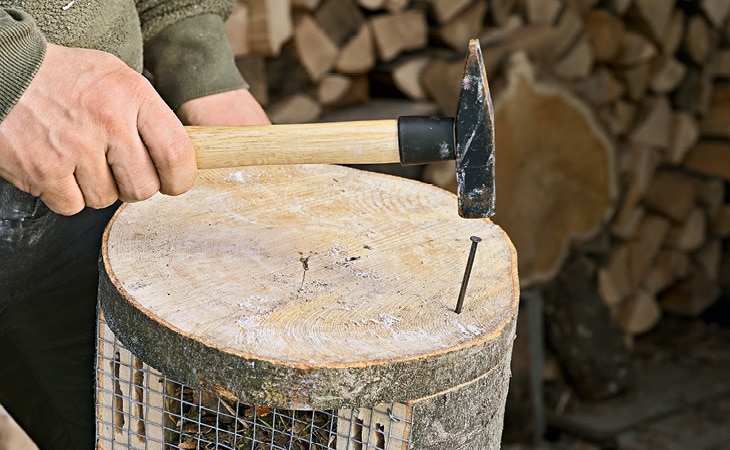
Now that your hotel is filled with nesting materials, it’s time to attach the base. Using the cookie you cut in step two, attach to the base using your hammer and nails.
STEP 9:
The last step is to fill the top of your bug hotel and attach the roof. Grasses and mulch here will attract bees which will do wonders for your garden.
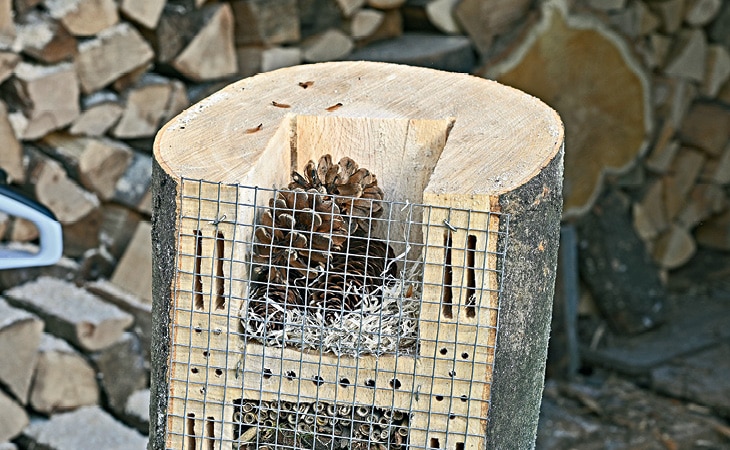
Adding wood shavings and pine cones will also attract earwigs and lady bugs.
Once you’re happy with your nesting materials, attach the roof as you did the base in step 8.
Be sure to share your garden projects with us on your social channels, and tag STIHL Australia for your chance to be featured!
Related