#How To
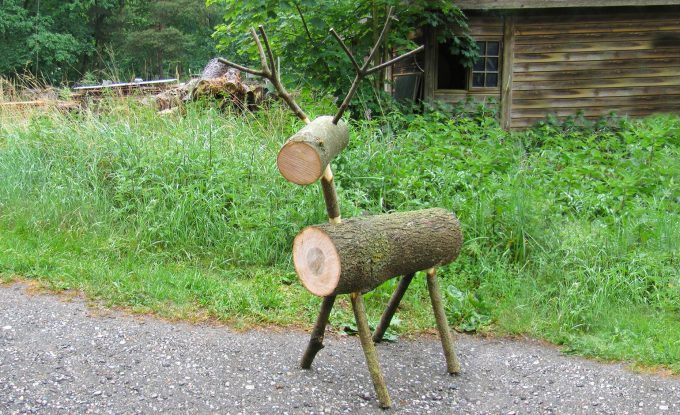
Create Your Own Wooden Reindeer!
Create a unique Christmas ornament for your garden with the kids, or impress your guests with some cute table toppers on the big day. Follow these easy-to-follow steps to create your own wooden reindeer in nine simple steps:
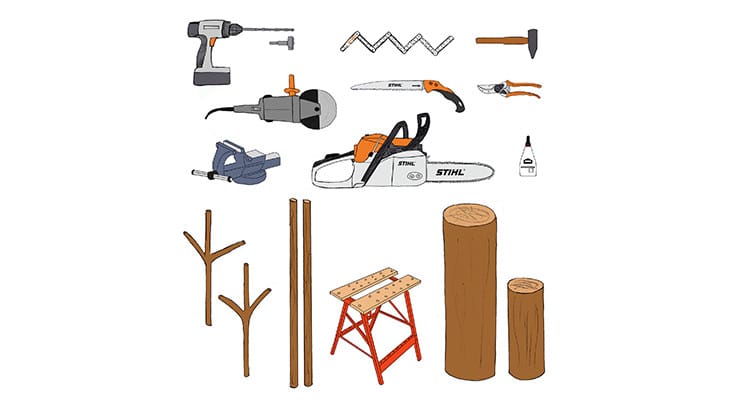
Step 1: Prepare Your Wood & Tools
The reindeer’s body can be made with any kind of hardwood, and the legs and neck can be made from larger branches from the ground. For the antlers, choose forked, thin branches to create a lifelike look.
Materials Checklist:
- One log (about 20 cm diameter)
- One log (about 10-12 cm diameter)
- Forked branches for antlers
- Thin trunks or thick branches (about 5 cm diameter)
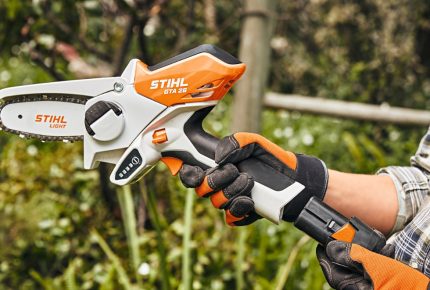
- STIHL chainsaw
- STIHL pruning saw
- STIHL secateurs
- Drill with wood drill bits
- Sawhorse (optional)
- Wood glue
- Hammer
- Workbench
- Angle grinder
- Vice
- Folding ruler
TIP: While glue can be used to make your reindeer more stable, it does not dry easily on damp wood, so we recommend using dry wood if you wish to use glue. If you only have access to damp wood, put the reindeer together first and glue the parts in place once the wood has dried.
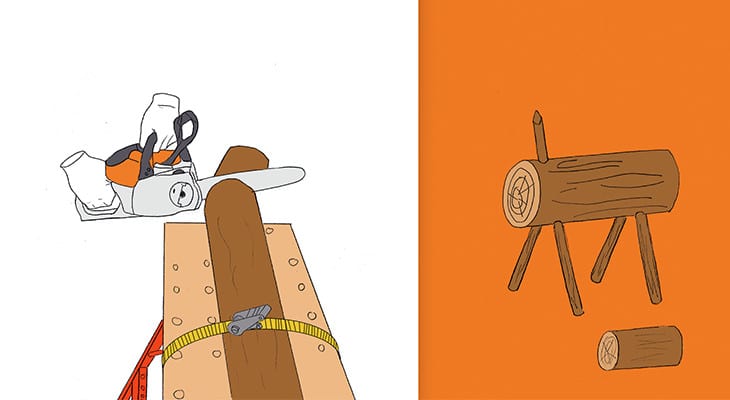
Step 2: Prepare The Body Section
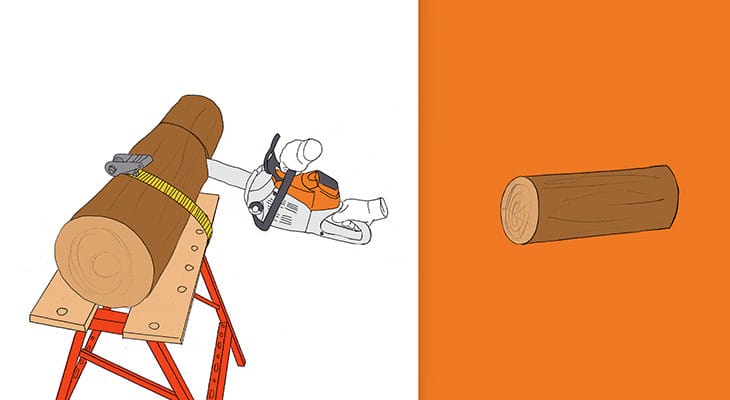
For a larger reindeer, place the 20cm log on your sawhorse or workbench, and measure a length of approximately 60 cm. Mark this length using your chainsaw or a suitable marker, such as chalk.
Position the trunk and fix it in place so that the shorter end from the mark extends over the edge of the workbench. Using your chainsaw, cut approximately two thirds of the way, then turn the trunk over so you can make the final cut from above. Be careful not to cut the full way through, as the piece being removed may break off early and splinter.
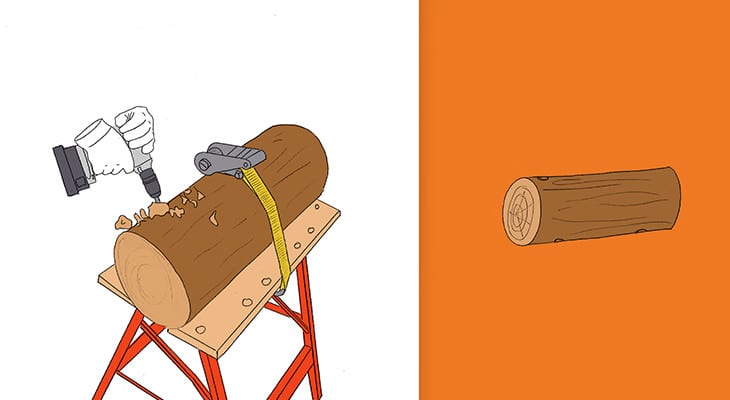
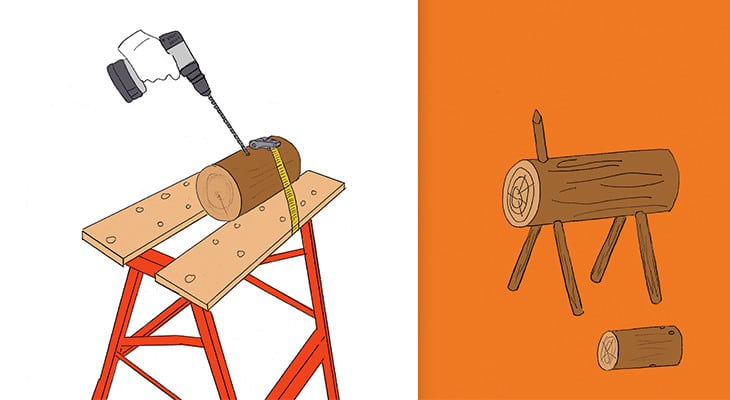
Step 3: Make Holes For The Legs & Head
Once you have your body section complete, place your log evenly on your sawhorse or workbench. Using a drill, make four holes in the log for the leg pieces. As a guide, these should be approximately 45 degrees from the centre of the log and 5cm deep. Once you’ve done all four, turn the log over and drill a 5cm hole for the head. This should be on a very slight angle, but straight enough to support the weight of the head.
TIP: When choosing a drill bit, use the diameter of your leg and neck pieces as a guide, and select a bit that has is slightly smaller.
Step 4: Prepare The Legs & Neck
Using your 5cm branches, prepare the leg pieces by cutting them to approximately 40cm in length, and another 20cm length piece for the neck. A smaller battery or petrol chainsaw is suitable for a branch of this size.

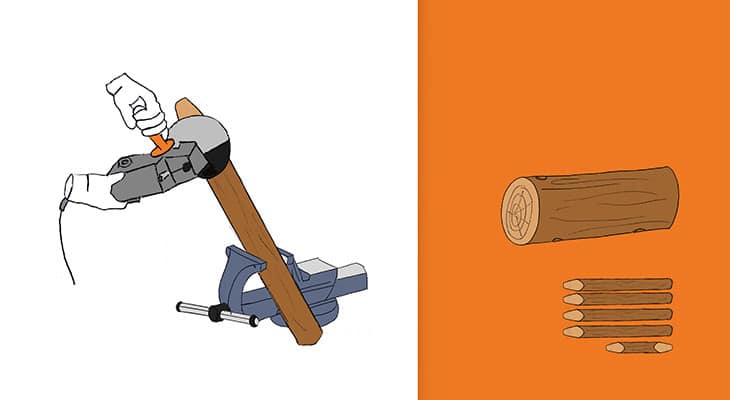
Step 5: Taper The Legs & Neck
Use a vice to clamp the branches in place so they don’t move around, and taper one end of each of the legs and both ends of the neck piece. Don’t make the ends too sharply pointed, and be sure to you test them for fit against the relevant holes to make sure they’re snug.
Step 6: Mount The Reindeer Body
If you’re using dry wood, apply some glue straight into the four drilled holes and use a hammer to gently tap the legs into the body. Once the glue has dried and the legs are in place, stand it up, and repeat the same process for the neck piece. If your wood is still damp, assemble the parts without the glue, and add glue later one the wood has dried.
Step 7: Prepare The Head Piece
Please your 10-12cm log onto your sawhorse or workbench, and mark a length of approximately 25cm. As we did with the body, cut approximately two thirds of the way through, then turn the trunk over so you can make the final cut from above.
Step 8: Drill Holes For Head & Antlers
Drill a straight hole for the neck in the lower side of the head section so your reindeer holds its head at a natural angle. Turn the log over, and drill two holes using a smaller drill bit for the antlers. These should be angled slightly towards the centre of the log.
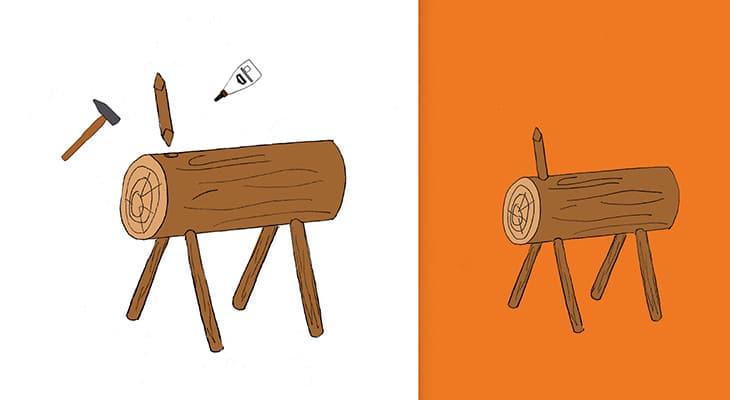
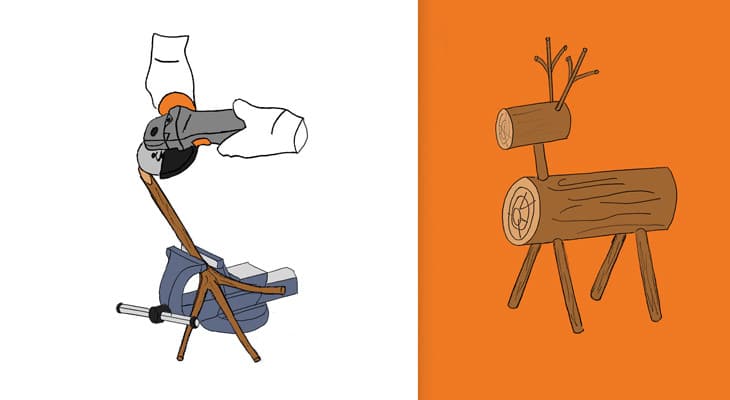
Step 9: Create & Mount The Antlers
Use your pruning shears to remove any unwanted leaves and smaller twigs from your antler pieces, then taper the lower point of each brand using your angle grinder.
Once done, attached the head to the neck piece, and the antlers to the head.
And you’re done!
Don’t forget to upload to a picture to your socials when you’re done and tag @stihl_au for Instagram or @STIHLAustralia for Facebook.
Related