#How To
DIY a Small Timber Side Table
It’s easy enough to pick up a side table from your nearest big-box retailer, but it’s no match for displaying one that you made yourself. Not only is a small DIY table an excellent use of timber offcuts, it’s the ideal way to personalise your home on a budget. Follow this helpful step-by-step guide to create your own timber side table using the STIHL GTA 26 battery garden pruner, which doubles as an excellent craft saw.
Tools and materials
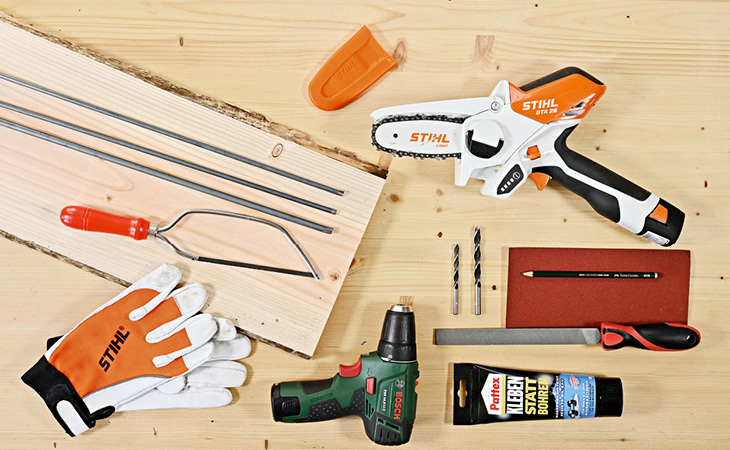
You will need:
- Wooden plank for the tabletop
- 3x metal rods (1m each) for the table legs
- Assembly glue
- Sandpaper (grain size 120)
- Pencil
- Metal file
- Metal saw
- Cordless drill (or screwdriver) – bit sizes 8mm and 6mm
- STIHL GTA 26 battery garden pruner or another handy wood saw
Protective equipment
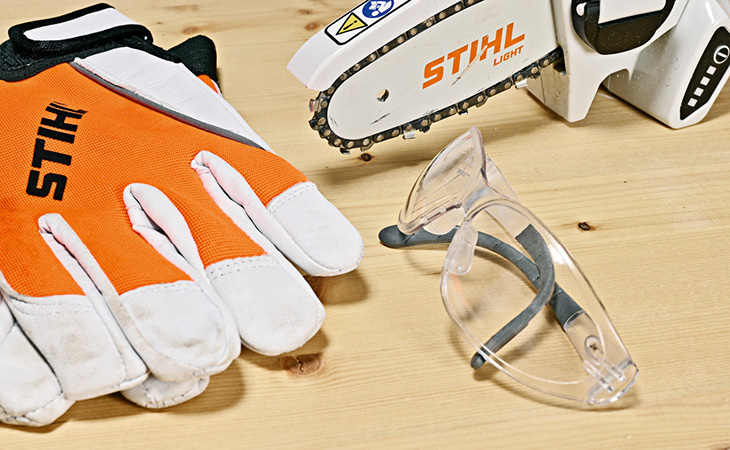
Always wear protective goggles and work gloves when using the GTA 26 battery garden pruner. Observe the safety instructions in the instruction manual. It is also recommended that you wear protective goggles when cutting metal or drilling.
Step 1: Mark up your timber
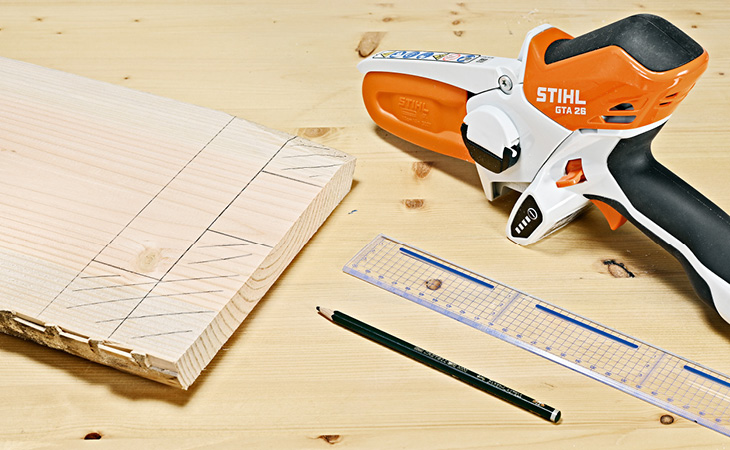
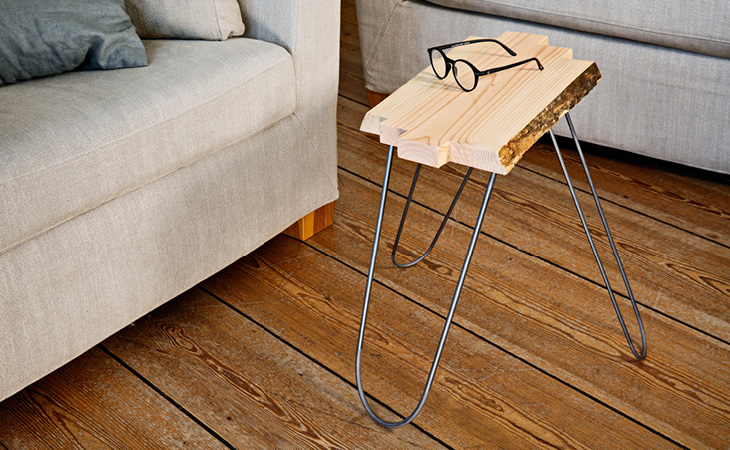
Start by creating your desired design for the tabletop. Use the images as a reference but bear in mind that these are a guide – you can be creative! Draw in pencil on the underside of the timber. Keep in mind that straight cuts are easier to make, and consider the order of the cuts in advance.
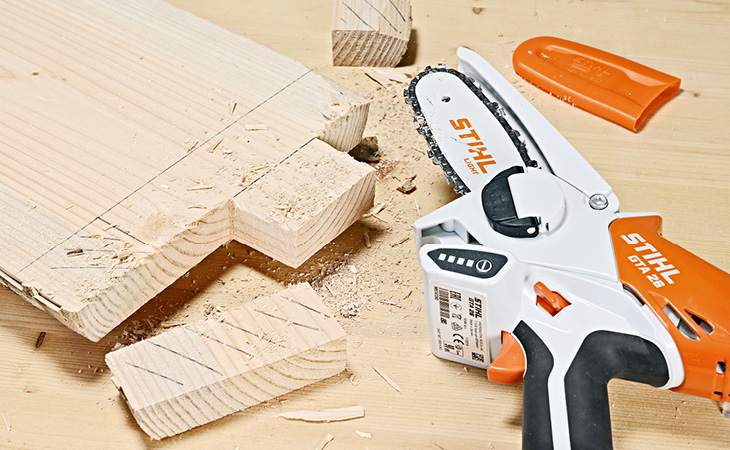
Step 2: Cut to shape
Use the saw to cut out your design. If using the GTA 26, place it against a stop and guide with two hands. For best results, always start from the bottom so that the cut in the cross beam does not tear out on the table surface.
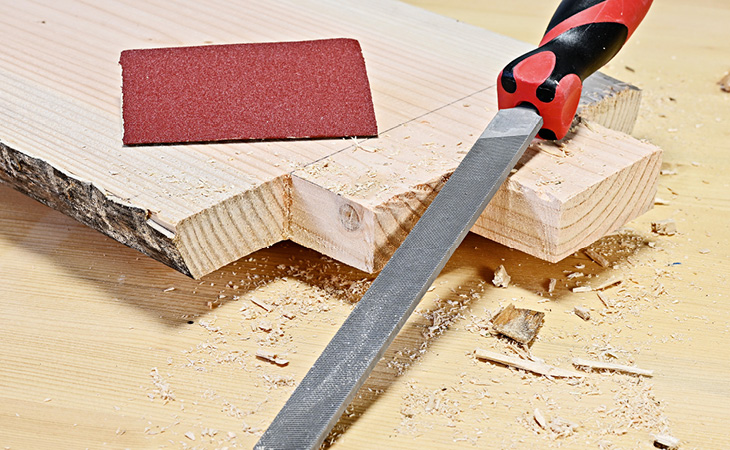
Step 3: Smooth edges
Your edges will likely be ragged on the underside of your timber. Use a metal file to even them out, then smooth thoroughly using sandpaper.
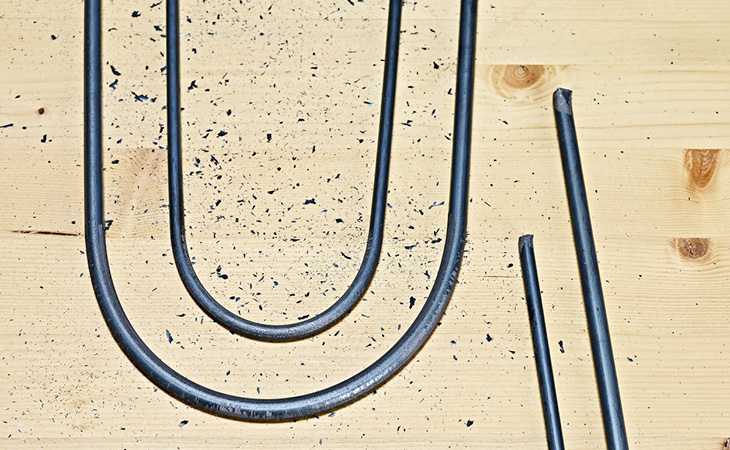
Step 4: Make the legs
Next, make the table legs by bending the metal rods carefully and slowly with both hands. Depending on the diameter of the rod, arches of different sizes will be created. Remember that it’s normal for metal to chip off the rods.
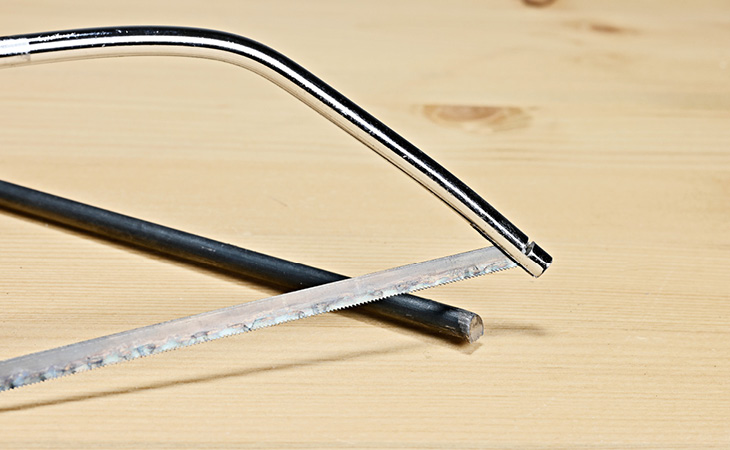
Then use the metal saw to shorten the legs to your desired height.
Step 5: Attach the legs
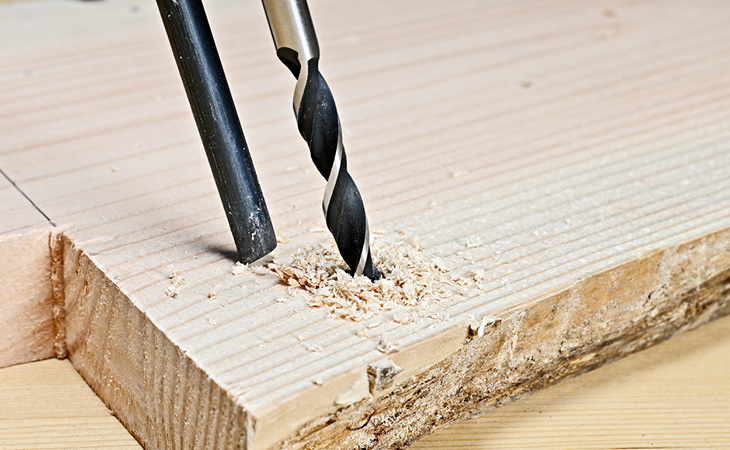
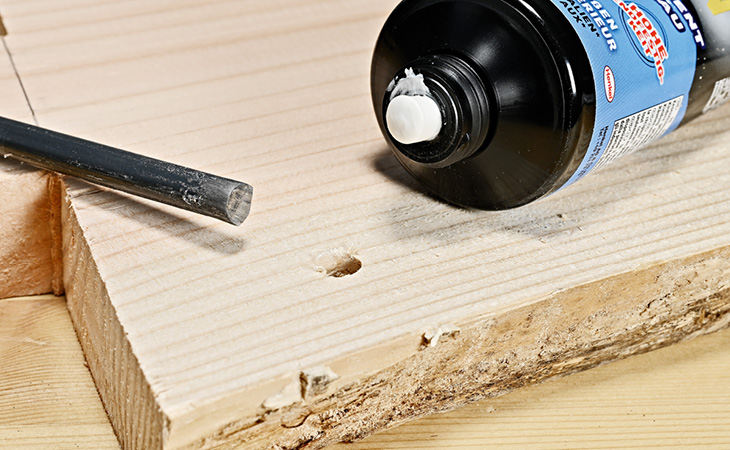
Drill four holes in the tabletop, two per table leg. Make sure your drill bit is the same circumference as the metal rods. The holes should be drilled at a slight angle so that the table legs extend outwards. Place assembly glue into the holes and insert the legs. Allow glue to air dry (this should take around 24 hours depending on your glue product).
Step 6: Coat the tabletop
Now it’s time to apply your finish. Depending on the look you are after, you may like to use a clear varnish, stain or paint for solid colour. Depending on your finish, you may need to apply several coats.
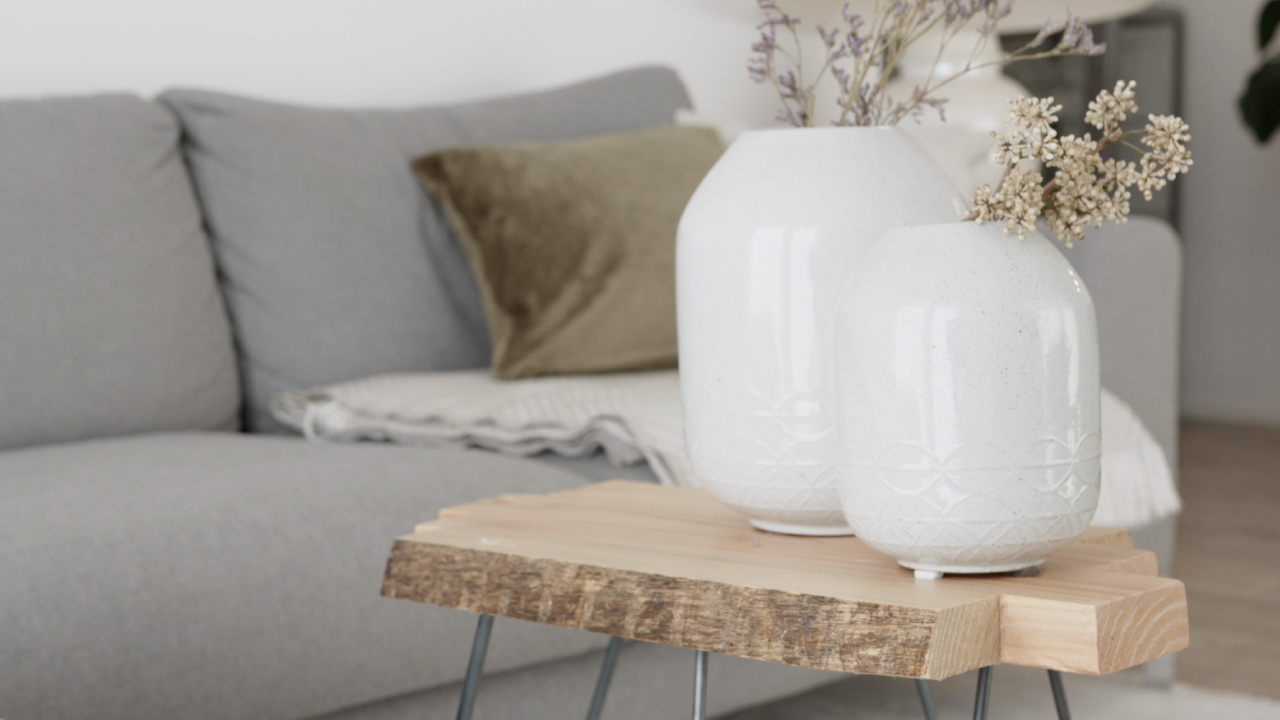
Now that your DIY side table is complete, it’s time to style it! Add a stack of books, coasters or a vase to bring life to your indoor space.
You can also share your creation with @stihl_au on Instagram for your chance to be featured.
Related