#How To
DIY Device Holder For Your Workshop
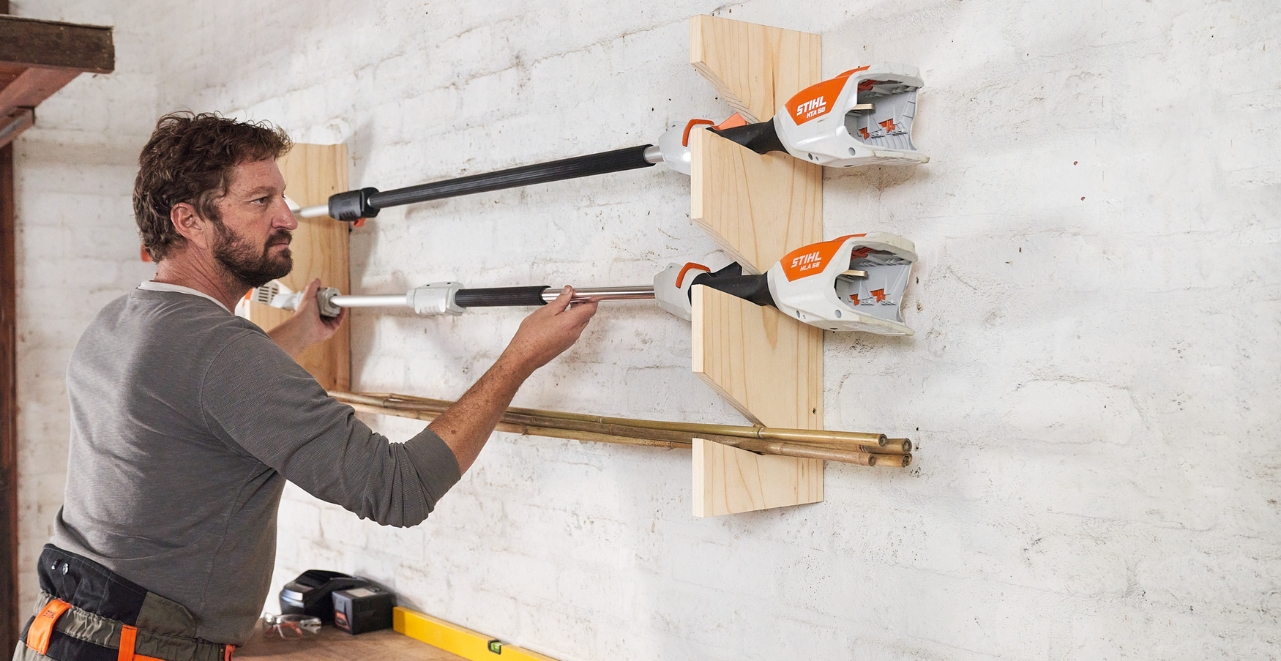
This horizontal tool holder is solid, durable and inexpensive, because residual timber that has accumulated, for example, during other DIY projects, is well suited for this project. Your tools will hang securely and firmly but can still be easily removed with one hand.
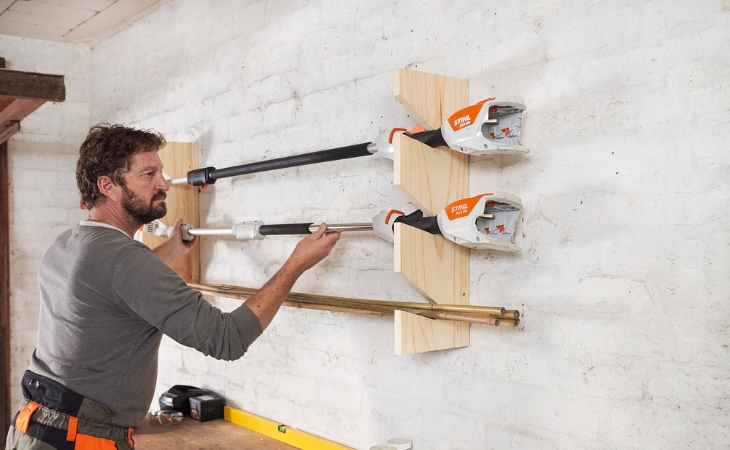
Heavier or long reach tools present a challenge to almost every device holder so this project is perfect for those kinds of tools. two boards mounted vertically on the wall with corresponding recesses forms the tool holder. The STIHL GTA 26 garden pruner cuts the recesses properly and in next to no time into the spruce board. The spacing of the boards on the wall can be freely selected. More notches in a correspondingly longer board for even more equipment are allowed – or for bamboo poles for tying up plants such as tomatoes, which otherwise often stand around in a corner of the shed.
Material and tools
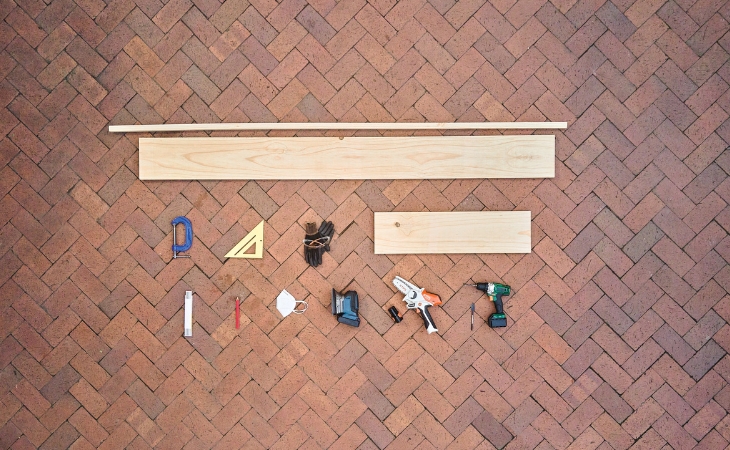
- 2 spruce boards with a gauge of 22 mm; 650mm x 220mm
- 2 wooden strips, approx. 30 mm x 30 mm x 650 mm as a mounting aid for the wall
- Flat drill 35 mm, alternatively a sharp Forstner drill
- Clamps for fastening the wooden board to the workbench
- Pieces of wood to place underneath so that the workbench will not be damaged
- Powerful cordless screwdriver
- Delta grinder with 120 grit or appropriate sandpaper for manual sanding
- 8 x Spax screws 4 x 45 mm to screw the device holder to the strips
- 4 x dowels 10 x 50 mm plus matching screws. The dowel gauge and type depends on the properties of the wall
- STIHL GTA 26 garden pruner
- PPE: Safety goggles and gloves when sawing with the GTA 26, work gloves, ear protection and respiratory protection when working with the Delta grinder
STEP-BY-STEP GUIDE:
Step 1: Determining the position
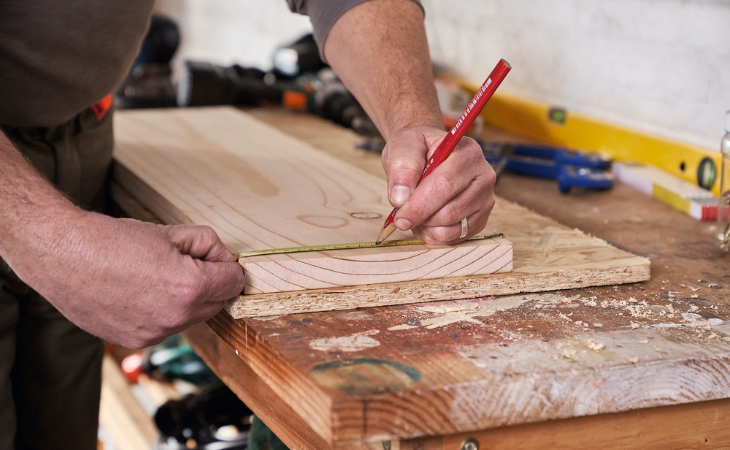
Draw the mark for the drill holes centrally on a board. In our example, the drill holes are 10 cm, 29.5 cm and 49.5 cm from the bottom edge of the board.
Step 2: Drilling
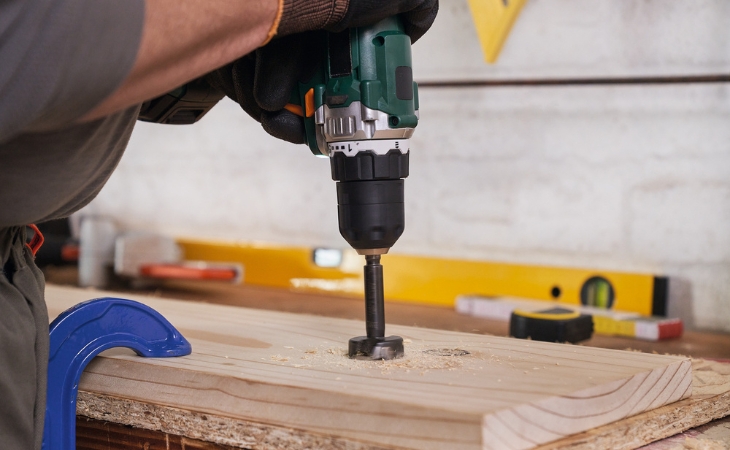
Drill through the board at the marks with the flat drill, the points being the center.
Step 3: Drawing
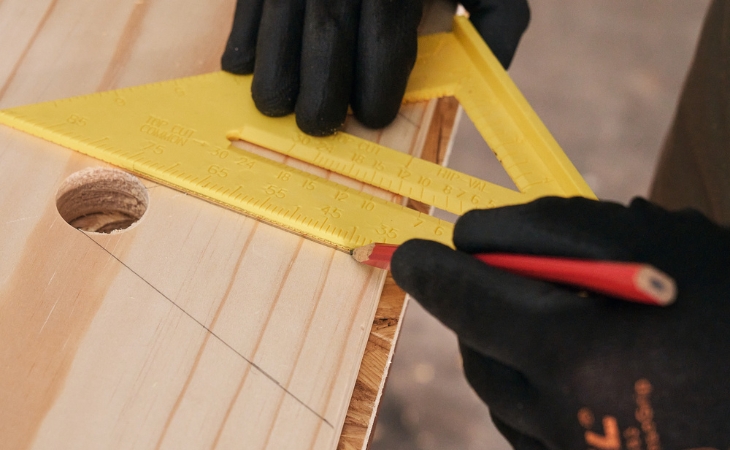
Use the top and bottom points of the holes as the starting points for the lines.
These start from the top point at an angle of 35° and from the bottom point at an angle of 15°.
Step 4: Sawing out
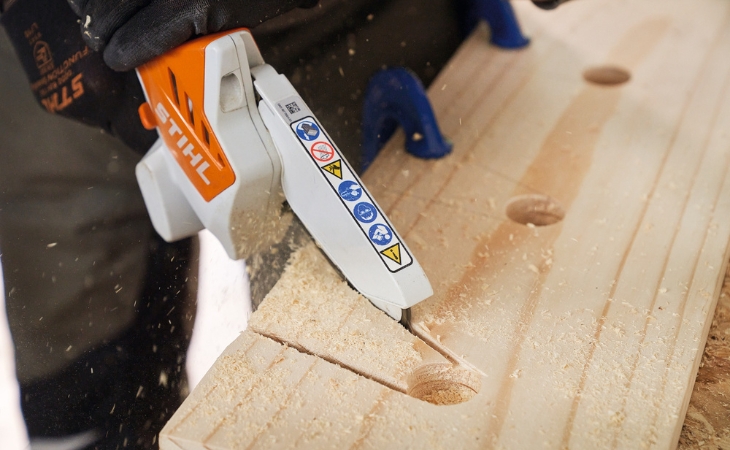
The STIHL GTA 26 garden pruner saws with a cutting width of approximately 5 mm. You therefore make the cut slightly next to the marked line, score the board superficially a few times with the GTA and then gradually slice your way through the board. Use the finished board as a template for the second one and drill or saw out the recesses accordingly. Please do not forget to put on your personal protective equipment before working with the garden pruner and to place a board (residual timber) on the workbench as protection.
Step 5: Grinding
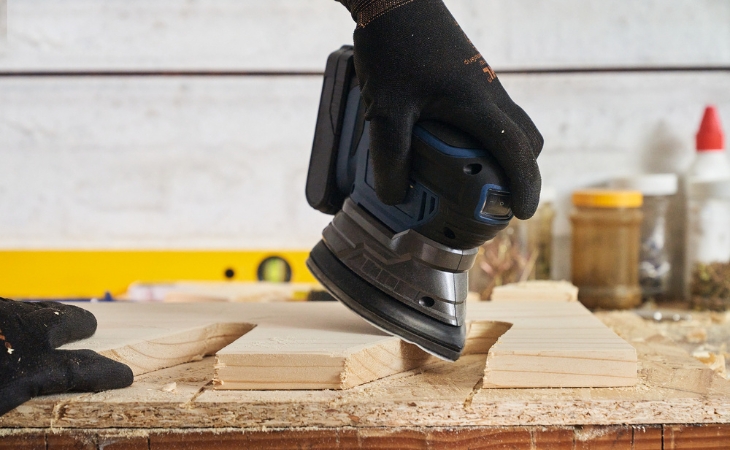
Smooth the corners and edges with the Delta grinder or by hand with sandpaper.
Step 6: Screwing tight
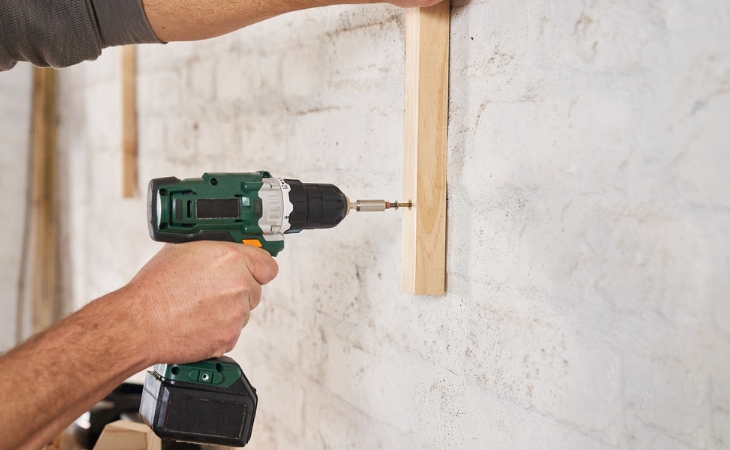
Pre-drill the screw holes for the device holders on the strips so that the strips do not splinter when the device holders are attached. Then fasten the 30 x 30 mm strips to the wall with two dowels each at the desired height. Then screw the device holders to the outer sides of the strips. In our example, both boards hang at a distance of
146 cm from each other. This distance is suitable for most gardening tools.
Step 7: Suspending the devices
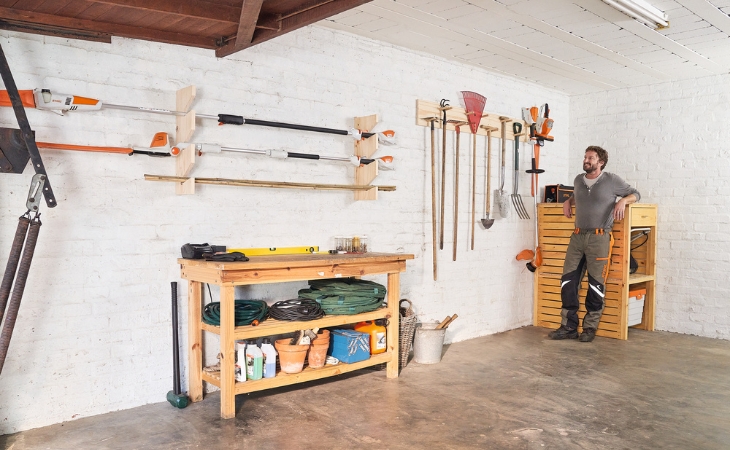
This device holder as well is at once ready for use.
Related