#How To
How To Create A Vegetable Patch
Do you dream of being able to harvest your lunch or dinner from your very own backyard? Make it happen with our easy-to-follow guide on how to create a vegetable patch from scratch. In principle, you can make a vegetable patch at any time of year, though it’s best to avoid doing so when the weather is extreme. As such, the best time to get started is either during autumn, early winter or in spring – when the conditions are just right!
Step 1: Finding the perfect home for your new plantings
With just a few square metres to spare you can easily grow just about any type of vegetable to suit the season. And, with a little planning, your vegetable garden could even become the main supply to your dining table all year round.
Sunshine is the key to tasty crops, so think about positioning your patch in the part of your garden that gets the most sun throughout the day. You should also think about shelter, as many plants will not thrive in a windy spot; small, low hedges or loose bushes offer good protection from the wind and will shelter your vegetables without enclosing them completely.

Start by drawing the outline of your bed using string and stakes, or by scattering chalk to mark the sides. Vegetable patches are generally rectangular, and a width of around 1.2 metres means you can reach all the plants in the bed from the sides. A single bed should not exceed four metres in length – if you have more space for your vegetable garden, make several separate beds. Remember to include paths between the beds that are wide enough to work from; the main path should also be at least around 80 cm wide, so you can take a wheelbarrow down it at planting time.
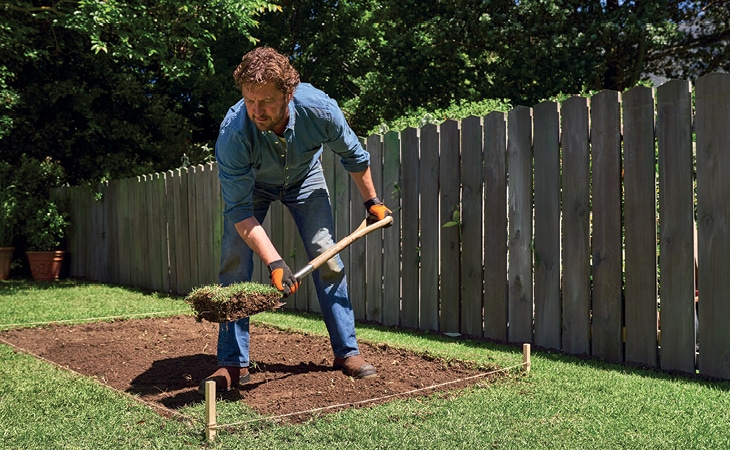
Step 2: Clear and prepare the ground
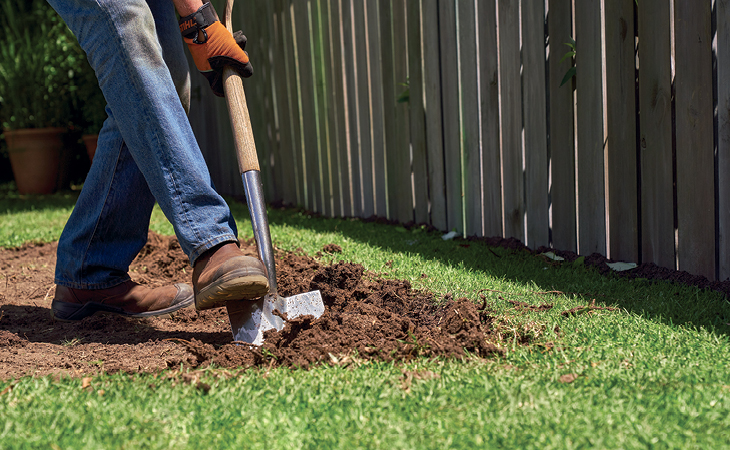
If your new vegetable garden is located on a lawn, you will need to lift off the turf and loosen the earth underneath, which is best done with a shovel.
If the area is very overgrown or if the soil is compacted, using a tool such as the STIHL KombiSystem with pick tine will help you do this with ease. Clay soil in particular benefits from this kind of digging over before you start planting, as it allows water to penetrate more easily and ensures that the soil gets sufficient oxygen. Alternatively, this step can be done using a fork and shovel.
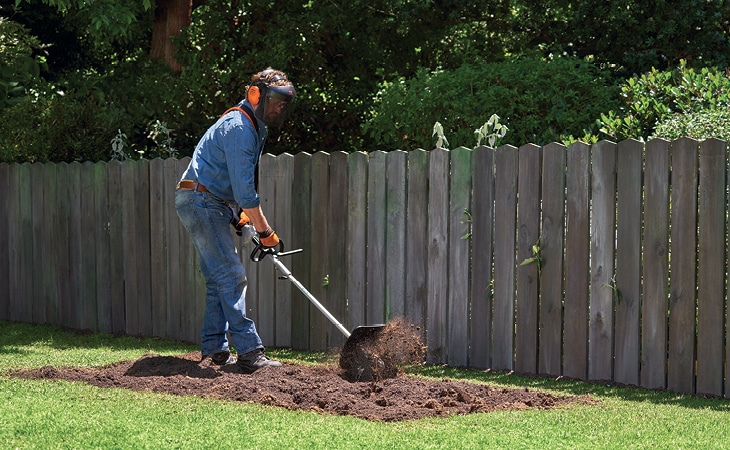
Be aware the the process of aeration will change the structure of soil and can upset the crucial micro-organisms in your soil. So to create a vegetable patch, thorough digging over with a cultivator is only recommended if the soil is too hard or too heavy, and should result in loose soil that is immediately ready for planting. It is also important to remove any stones, as these can hinder the growth of roots and root vegetables later on – this is how you end up with crooked carrots!
Step 3: Prime your soil
Preparing the soil for your vegetable bed means adding compost or natural fertiliser directly into the ground. Bonemeal is one good way of adding nutrients to the soil. The type of soil improvement you use depends on the nature and condition of your soil. It’s worth doing extra research here, as well-prepared soil will support successful planting and a heavy vegetable harvest later. Finish by levelling the soil surface with a rake.
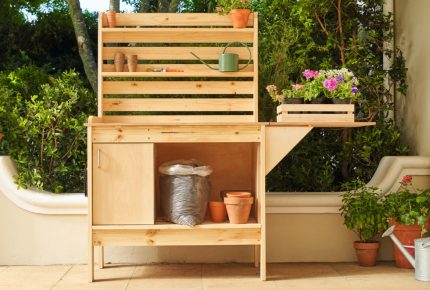
Step 4: Give your bed a border
This step isn’t absolutely necessary, but it will make your new vegetable patch look nice and tidy, and will also add some interest to your garden. You can use boards, dowels or stones to create a border, and doing so will keep the soil in the bed and protect your plantings against pests. You should make sure that the bed does not rise too high above the surrounding ground level, otherwise the edges, and in turn, your soil, will dry out.
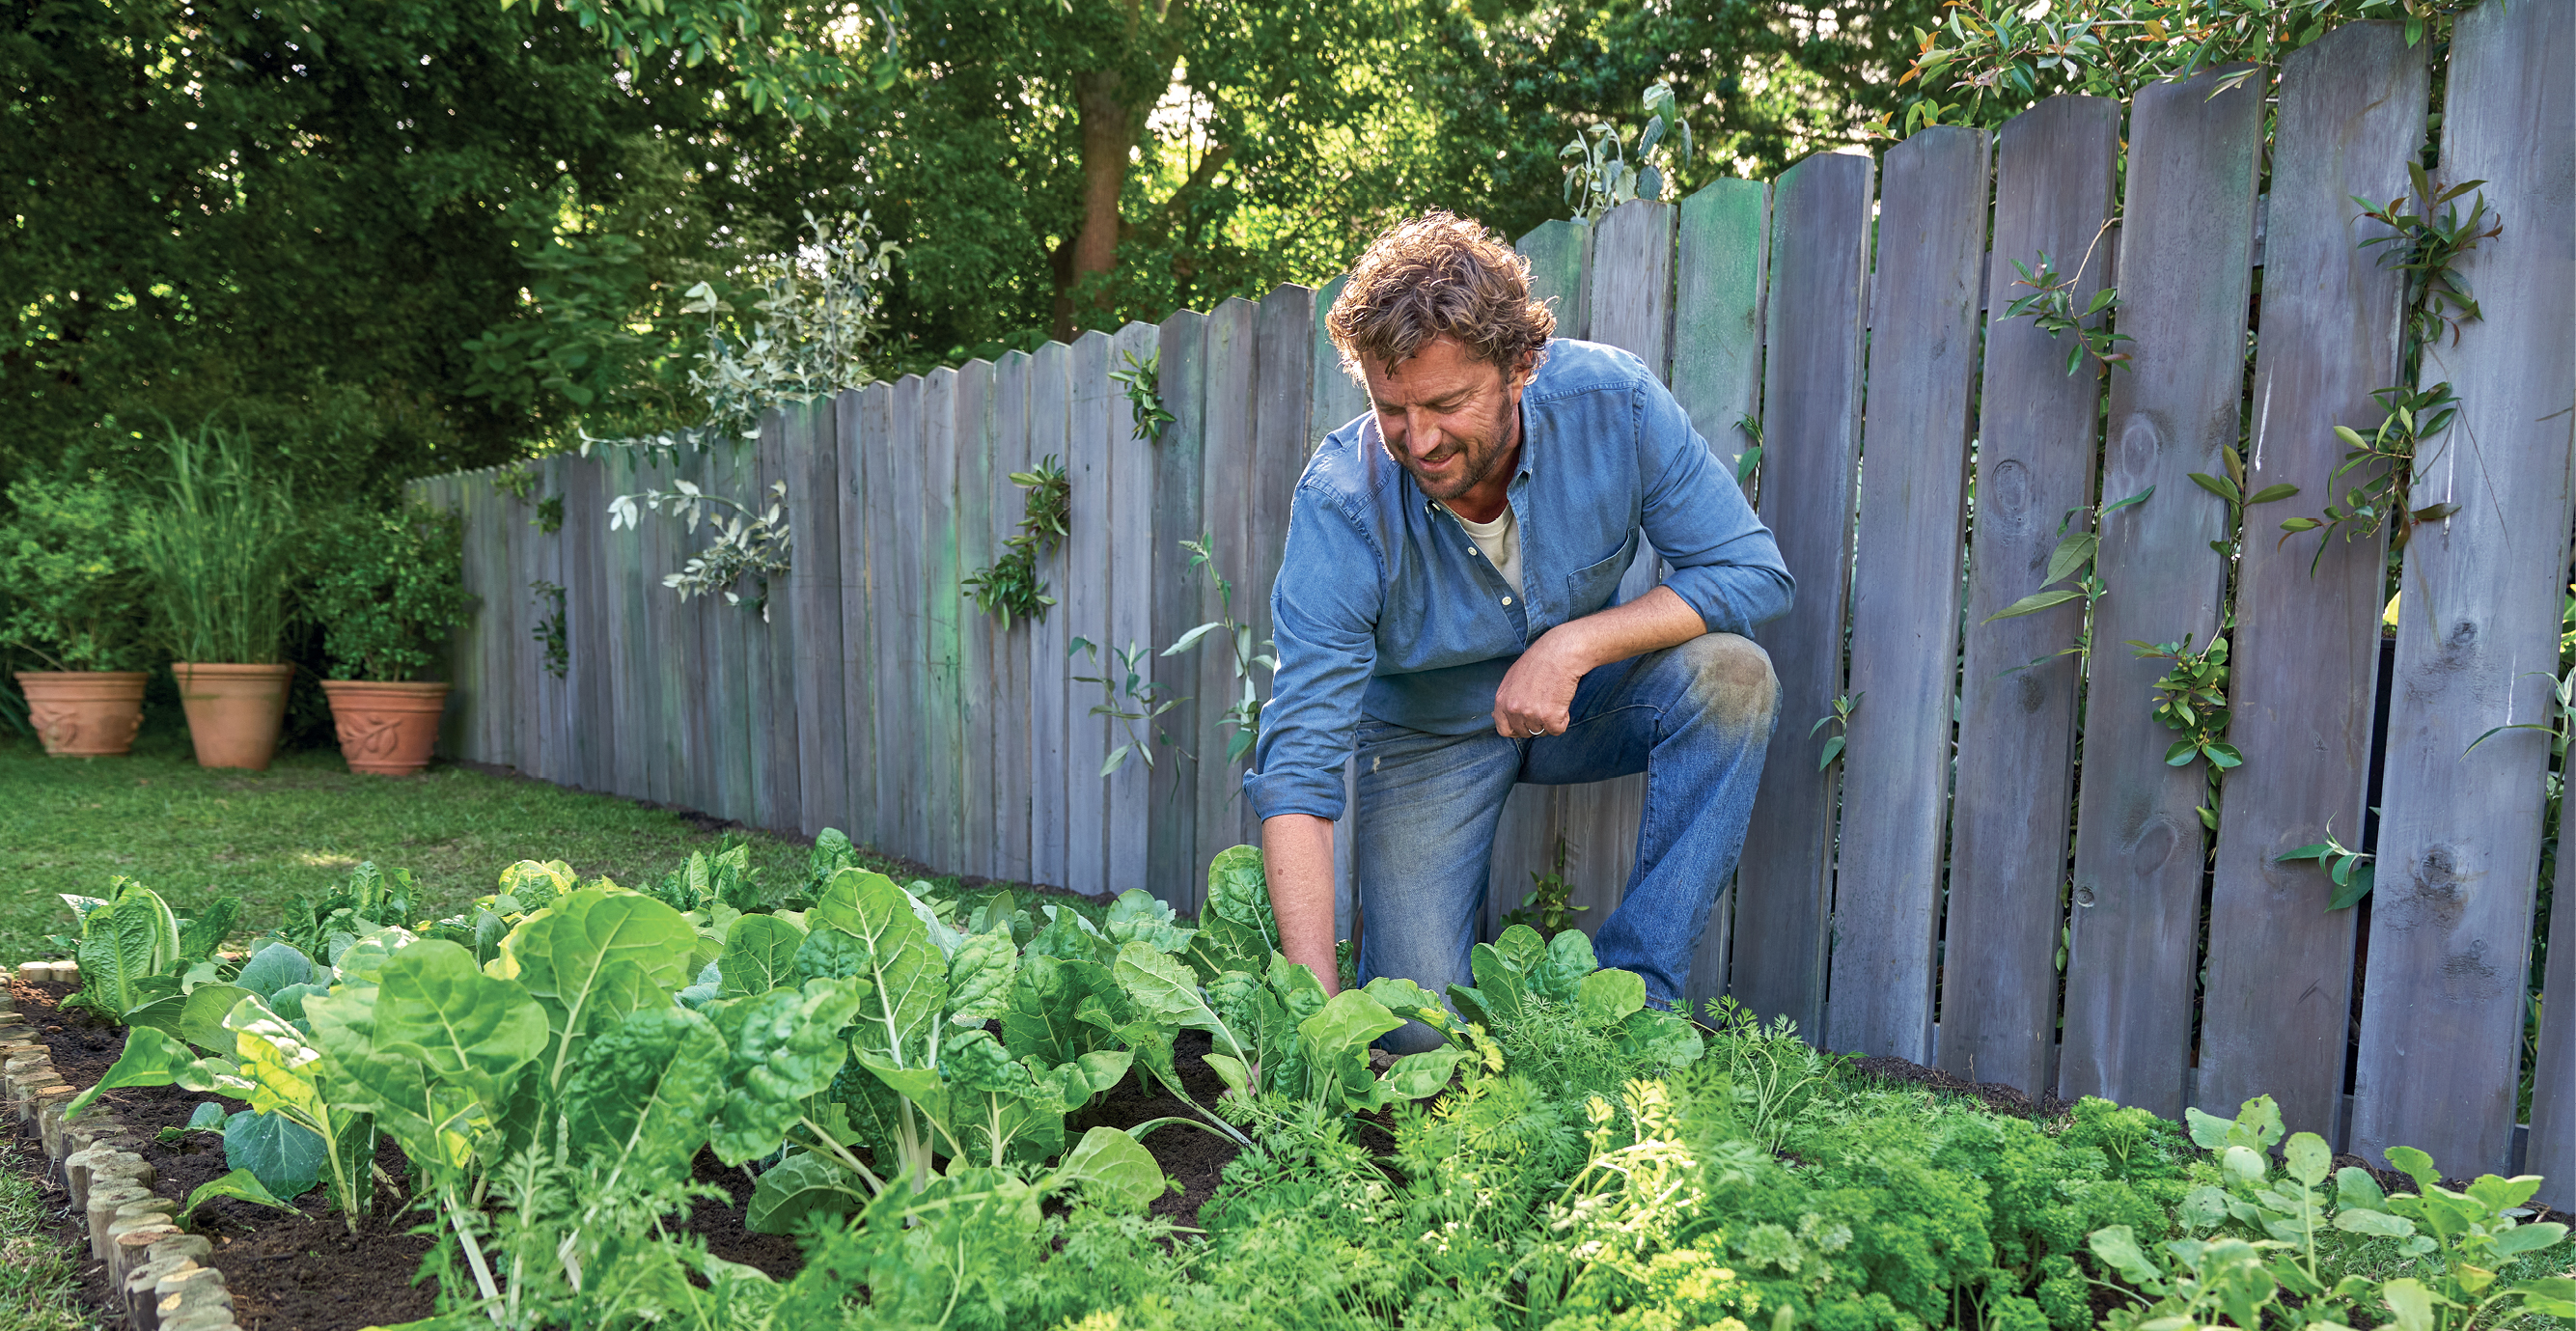
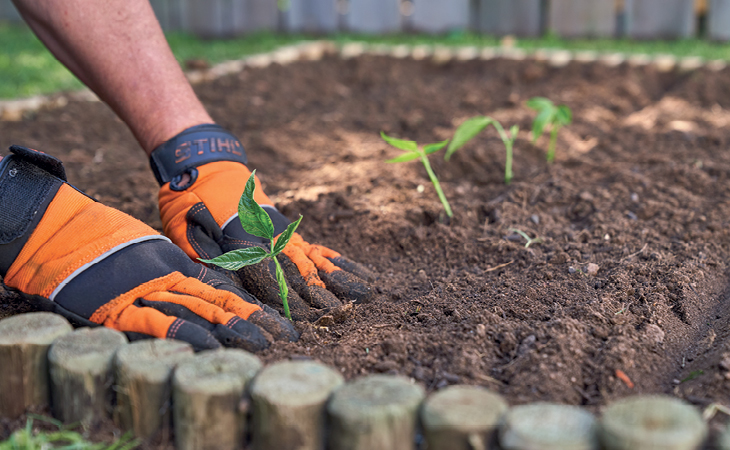
Step 5: Plan before you plant
Your vegetable patch is ready for planting and welcoming its new occupants home. But, before you get started, it’s best to draw out a planting plan and decide what will grow where; this will make planting easier.
At planning stage, it is important to consider which types of vegetables go well together. The best neighbours keep pests away from each other and do not go after the same nutrients. Make sure you leave enough space between plants – crowded vegetables will not thrive. Seed packets will usually include this information.
Mark the necessary distances and the rows for your vegetable patch on your planting plan. You might find it useful to stretch a string across the bed to make sure you’re planting in straight lines, and use a rake to make a small trench for your seeds or seedlings.
There are two different options for planting up your vegetable garden, you can sow seeds or plant young seedlings. Both approaches have pluses and minuses. Seeds are usually cheaper, but seedlings are generally more resilient and can be harvested more quickly. Rare and unusual varieties are much easier to find in seed form.
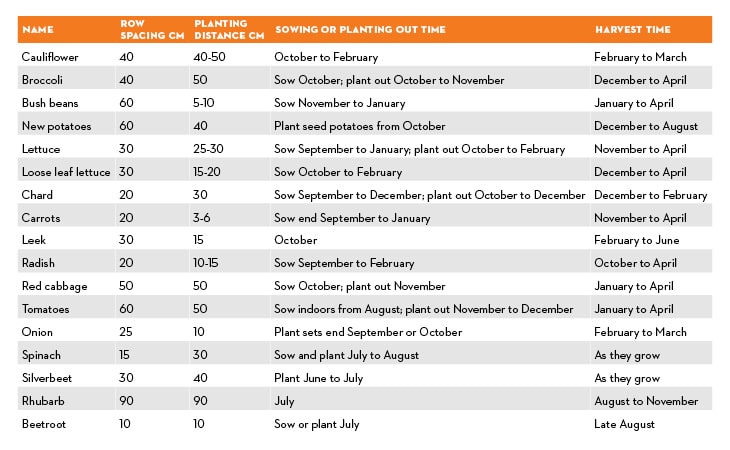
Step 6: What to plant and when
Every vegetable has its own appeal. We have put together some tips and ideas for you that will help you design your vegetable patch so that you can schedule planting and grow your vegetables successfully.
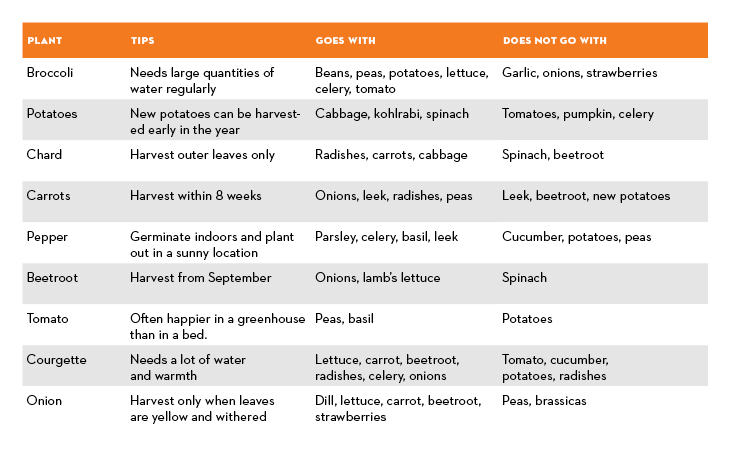
Step 7: Consider planting companions
When planting a vegetable garden, it generally makes sense to cultivate a variety of crops. In fact, some herbs and vegetables make particularly good garden companions because they help protect one another from pests and so contribute to growing successfully together. Beware though: equally, there are some pairings of plants that should be avoided because they may actually impair each other’s growth. We have summarised some of the key companion planting rules to help you plan your growing to best effect.
Tips to get the most out of your new vegetable garden
- Crop Rotation & Succession
Each plant draws a particular profile of nutrients from the soil, and understanding this should guide your crop succession choices. For example, potatoes should not be planted immediately after tomatoes, aubergines, peppers or chillies. By contrast, lettuce and peas thrive particularly well in soil that potatoes have previously been harvested from. Crop rotation is worthwhile not only to manage the nutrient composition of your soil, but also because growing the same vegetable in one spot every year increases the risk of diseases and pests overwintered from the previous year.
- Green Manure
When it comes to vegetable gardens, green manure is created by leaving uprooted or sown crop parts to wither on a field so that they serve as a mulch and soil amendment. Keeping your vegetable garden healthy for the long term means allowing it to rest from time to time. During these fallow seasons, planting green manure plants in your vegetable garden is a good way of providing the soil with valuable nutrients while also suppressing weeds. Clovers and lupins are examples of good green manure varieties. Sow seeds for green manure in autumn, after harvesting; leave them over the winter; then cut them down and dig the cuttings into the soil, where they can provide goodness for bumper crops. It’s also worth planting green manure if you plan to leave a bed empty for an extended period.
- Maintenance & Watering
If you rake your vegetable patch regularly, you will not need to water it as often. Raking affects the soil structure by causing less water to evaporate. Just how much water you need to provide depends on what you’re growing, as well as the weather of course. Please note, it is generally better to water generously but less frequently than to water little and often. Collected rainwater is perfect for watering your plants.
We recommend leaving your vegetable garden to rest completely every three years so that it can regenerate. If it is constantly occupied by plants, the soil quality can deteriorate in the long term and the nutrients become depleted.
Share your garden projects with us by tagging @stihl_au on Instagram for your chance to be featured!
Related